Run a Video Detaection in Jupyter-Notebook
Many developers, analysts and data scientists use Jupyter Notebook to develop new algorithms. Here, we will walk you through all the steps required to move your code from the Notebook to a production-ready environment: the Ryax platform.
Tip
This guide assumes that you are already familiar with the Ryax platform. If not, please follow the tutorials first.
What do we want to achieve?
We want to create a service that detects objects on a given video.
As we go down that path, we recommend answering the 4 following questions that help designing Ryax workflows: 1) What triggers the workflow? In our case, users will send their video using an online form. 2) Who needs the results of the workflow? Here, only a Ryax user wants to access the final video. 3) What data do we need to run the required computations? We have one main computation: an algorithm that detects objects on an image. It needs to access images, then output the same images with the detected object circled and named. 4) Are my computations done in several steps? Even if the selected algorithm has several steps, we don't see how splitting it will make it more re-usable: let's keep it as a single workflow step.
As a conclusion, we will need the following actions: - a form source - a processor able to split a video frame by frame - the algorithm detecting objects on images - a processor that creates a video from a set of images
On this tutorial, we will focus on the most interesting action: tfdetection.
This processor does the detection of objects on images.
The source code of all actions, as well as the Juptyer-Notebook sample can be found here.
The notebook
The developped Notebook can be found here.
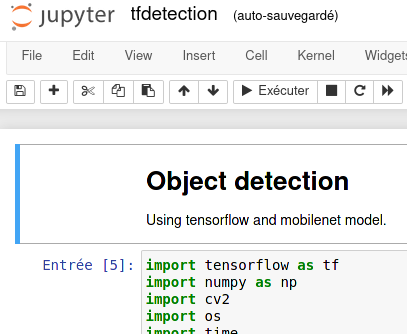
It uses Tensorflow and a local library called object_detection. We can see at the end of the notebook an example of a run.
Create the action
We put everything required to run the code in a new directory called "tfdetection" in actions/.
To be able to run the code in Ryax, we add 3 files:
- handler.py, to launch the code
- requirements.txt, to declare the dependencies
- ryax_metadata.yaml, to declare the meta-data
Note
more detailed explanations on how to build Python actions in Ryax can be found here
Step1: Dependencies
What are the dependencies of our code?
We can see at the beginning of the notebook that the code depends on pillow, matplotlib, opencv4, tensorflow, urllib3 and, object_detection.
object_detection is a local action available through the object_detection/ sub-directories.
Let's copy the whole directory in the action directory.
Ryax integrates all files present in the action directory inside the Ryax action.
We'll declare the other dependencies using the standard requirements.txt file:
Note: ryaxpkgs.opencv4-full is an optimized version of opencv4 made for Ryax.
Then, we will use the code in the notebook to create the handler.py file required to run some python code in Ryax.
Step2: extract code
The entry point of a Ryax processor in python is a file called handler.py.
This file has to declare a function called handle that takes a dict as parameter and returns a dict.
You can see the code here
The handle function will act as an interface between Ryax's input/output system and the main object detection code.
The other functions will make the right calls to perform object detections.
Step3: ryax_metadata.yaml
Finally, we need to declare all the metadata required by Ryax to understand the code. This is done in the ryax_metadata.yaml file.
apiVersion: "ryax.tech/v1"
kind: Functions
spec:
  id: tfdetection
  human_name: Tag images using Tensorflow
  type: python3
  version: "1.0"
  logo: logo.png
  inputs:
  - help: Model
    human_name: Model name
    name: model
    type: string
  - help: Directory with images to be tagged in any format accepted by OpenCV
    human_name: Images
    name: images
    type: directory
  outputs:
  - help: Path of tagged images
    human_name: Tagged images
    name: tagged_images
    type: directory
Don't forget to commit and push your code :).
Load actions
Now that the Ryax actions are ready, we will get them in the platform.
Log in to Ryax. Go to the "Repositories" screen.
Create a new repository called video_detection with the URL https://gitlab.com/ryax-tech/workflows/video_detection.git
Then, scan this repository to detect the actions. This repository is set up for public access, just type anonymous in both login & password fields.
Once the scanning ends, scan results should show the 3 actions that we want to build: Reassemble video from frames., Cut video frame by frame and, Tag images using Tensorflow.
Let's click on the build button for each one of them.
Note
"Building a action" consists of preparing the actions code to be able to run on the Ryax platform. Ryax fetches all the dependencies and packs them together for your code to run within the platform. More info on the "action build" concept here
You can go to the "action builds" screen and refresh the page until the 3 actions are built. Once they are build, these actions are available in the action store. We can now start assembling the workflow.
Create the workflow
Navigate to the Studio and create a new workflow. Click on the "+" button in the right panel. Add the following actions, you can use the search bar to find them: "Integrated form to trigger new streams", "Cut video frame by frame", "Tag detected objects on images using tensorflow" and "Create a video from multiple images".
Link them together this way:
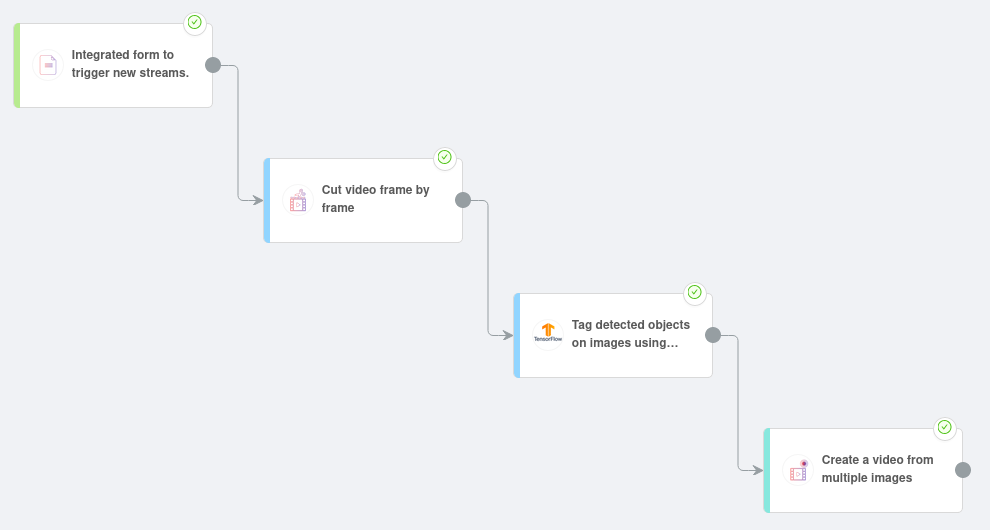
The last step is to fill in inputs for our actions.
Let's start with the "Integrated form to trigger new streams" source. Click on this action, then go to the "input" tab. Fill the introduction text with "Put a video here to detect objects on it.". To configure the form's fields, we'll edit the output of this action. Go to the "output" tab. Add a new output called "video" with a type "file".
Now let's fill the input of "Cut video frame by frame". It only require one input file: set it to to the output of the previous action (use "reference value" and select the previous action's output).
Then, for the action "Tag detected objects on images using tensorflow" we will use the ssdlite_mobilenet_v2_coco_2018_05_09 model and the images coming from the previous action.
Finally, the "Frame" input of "Create a video from multiple images" will assemble the tagging's results.
Run it
The workflow is ready to be deployed.
Deploying a workflow conists of launching all actions in the infrastructure so that they are ready to ingest data. More info here.
Click on the deploy button. Refresh the page until all actions are deployed (the status should be green), and the workflow is in the "deployed" status.
Now, click on the "Integrated form to trigger new streams" action. On the information tab, there should be a new button available: "access workflow". Click on it.
The form created in the previous steps is now open. Submit a video in which you want to detect objects. You can use this one. Submit the form.
We can now observe executions. Don't forget to refresh the screen using the refresh button to update the status of the executions.
Once the last action has been executed, click on it. In the output data, you can download the result file: our tagged video.
