Assembling new workflows
Now that you know how to operate an existing workflow, let’s create your own! This section will focus on workflow assembly and configuration (all modules being already built and available in the Ryax store).
As an example, we will create a workflow called “Analyze Twitter data”. This is a more advanced version of the workflow you handled in the previous section: this improved workflow will be able to automatically fetch real Tweets, analyze them and publish them to an external service.
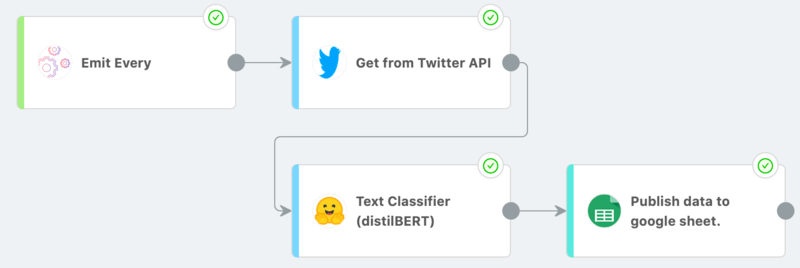
Here is a step-by-step description of this workflow:
Trigger an execution every so often (defined by the user) with the “Emit Every” source module
Pull a user defined amount of Tweets and Tweet metadata off of the twitter API according to some query, organize them and store them.
Take the data from the Tweets and use an off-the-shelf DistilBERT model (fine-tuned for text classification) to evaluate the sentiment in those segments of text. Then organize this data and pass it along.
[Optional] Take the scored data and publish it all in a structured manner to a Google Sheet.
For more information about this workflow, please refer to its complete documentation.
To start with, let’s create a new workflow from the Studio list page by clicking on “New workflow” at the top right of the screen:

For example, we’ll name this new workflow “My own Twitter analysis”. You can also enter a description if you wish (optional).
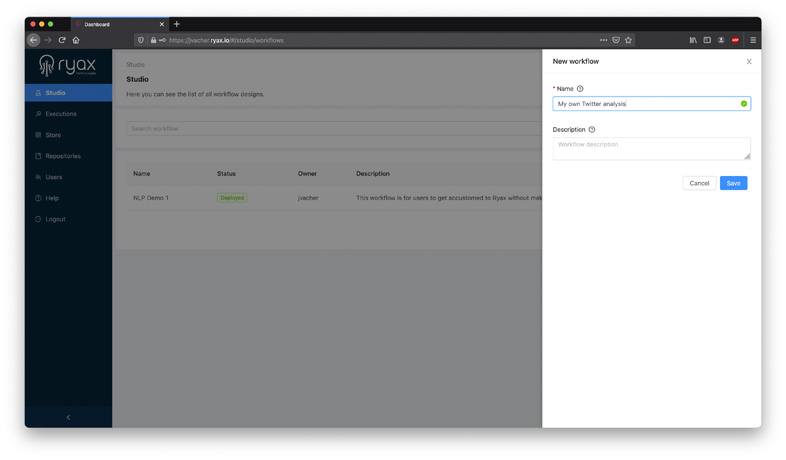
Click “Save”, and the Studio Editor screen will automatically appear, you are now ready to start assembling your workflow!
Note
To access your workflow later on, scroll or search the Studio list.
Editing in the studio
Searching for modules
Let’s start the editing process.
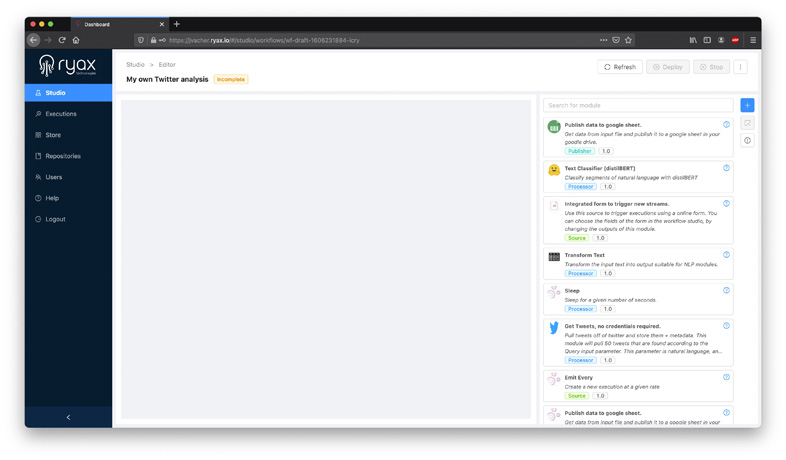
First things first, you’ll have to find the right modules for what you want to do with your workflow. You can use the “Module store” panel on the right (click the “+” button to open it) to browse through existing modules in the store:
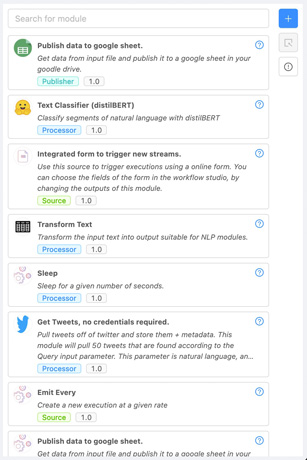
The Module Store panel displays basic information about available modules : name, short description, type, and version.
As a reminder, here are the different module types in Ryax (see the “Ryax concepts” section of this guide for more information):
|
Sources: to ingest data from external resources (like a database, a clock, a platform, …), also acting as workflow triggers. Often used upstream in a workflow. |
|
Processors: to process and transform data. Often used as intermediate steps in a workflow. |
|
Publishers: to publish data to external services. Often used downstream in a workflow. |


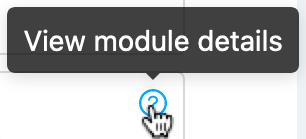
If you wish to get details about a module, you can click the “?” button to access its full page within the Ryax store:
For more information about the Ryax store and modules’ documentation, see the Ryax tour section.
To find relevant modules within the store, you can use the Quick Search field on the right. Let’s search for our first module, the “Emit every” timer module:
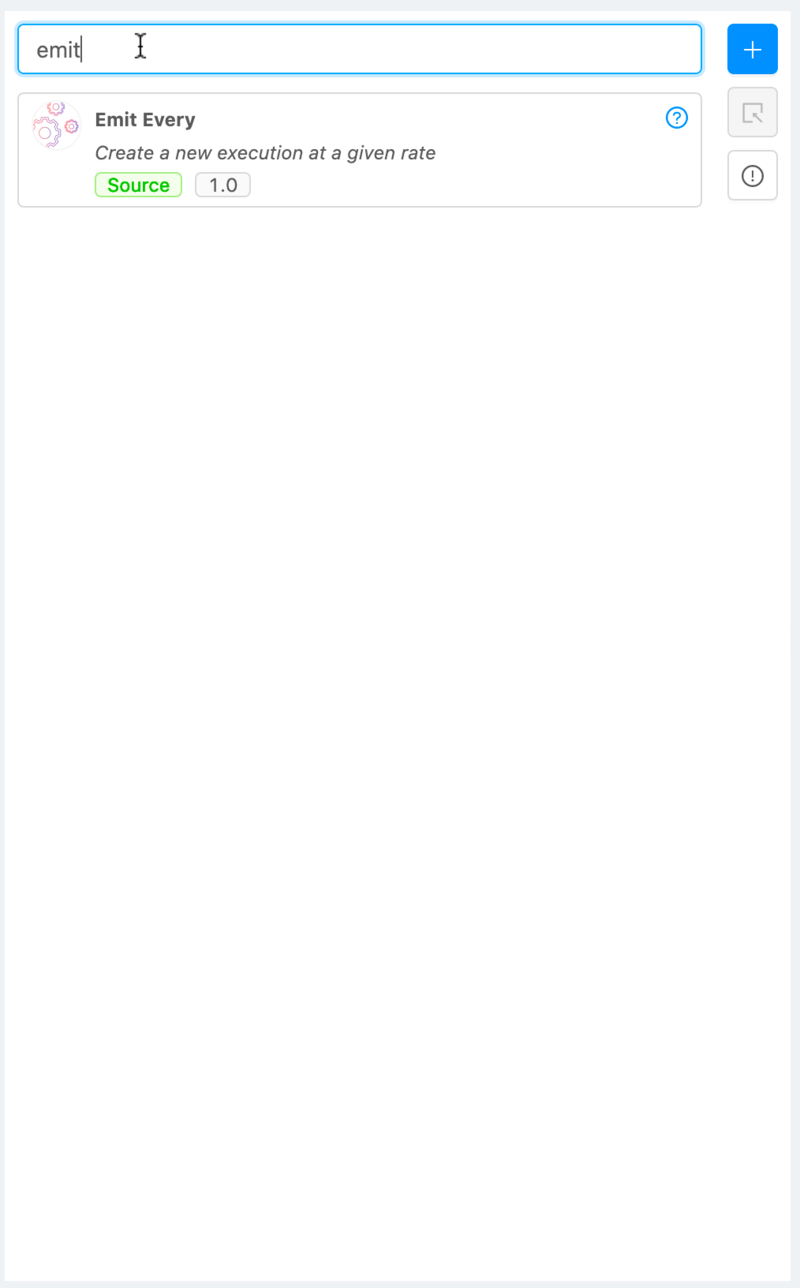
This module will be the Source of our workflow, and will trigger an execution every so often.
Assembling workflows
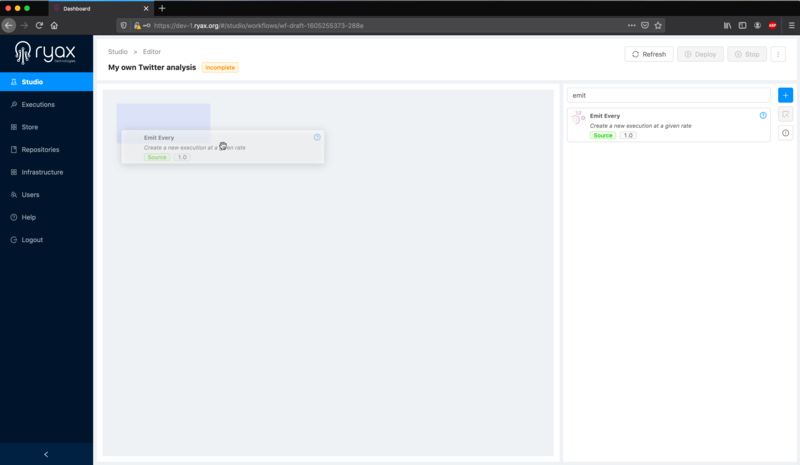
To start assembling our workflow, let’s drag our Source module in the canvas:
We’ll proceed the same way for the other modules! We can successively fetch and drag the following modules to create the backbone of our workflow:
“Emit every”
“Transform Tweets”
“Text Classifier (distilBERT)”
In the end, your Editor’s canvas should look something like this:
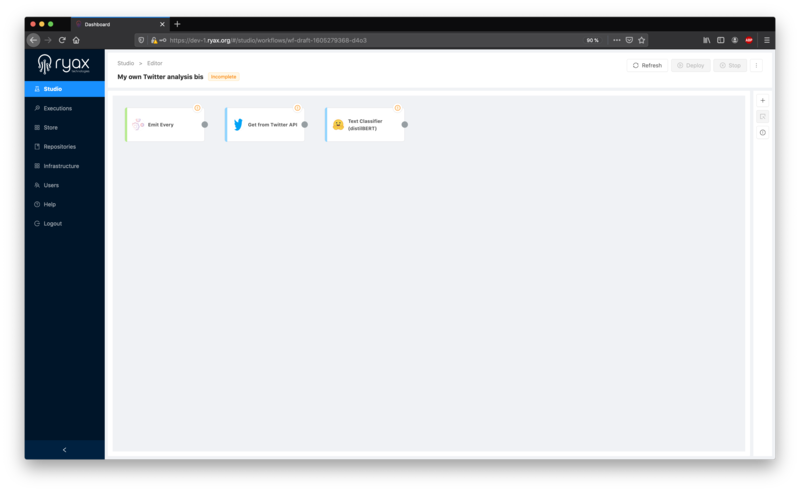
At this stage, we’ve gathered all workflow’s necessary modules in the canvas. For our workflow to become a true treatment chain, let’s link the modules together in the desired order.
For this, just hold and drag the Link Connector control from one module to the next:

Repeat this linking process for the rest of the workflow and you’ll get a fully interlinked treatment chain:

Assessing studio statuses
At this stage you can note that modules still display a “!” on their top right corner, which are warnings of potential incomplete configuration or interlinking. Ryax natively provides such warnings to help you only deploy ready-to-production workflows.
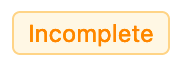
Additionally, our workflow’s general status itself is “Incomplete”, which means it is not yet ready for deployment due to improper config of its embedded modules:
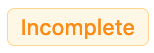
To get more details about these warnings, let’s click the “Warning” panel button on the right of the Editor:
Using the module warnings panel, you’ll be able to assess what could prevent your workflow from effectively running in production. In this example, all the warnings come from incomplete configurations of our modules, which is leading us to the next section: configuring modules.
Configuring modules
Our workflow is fully assembled and ready to be configured. As you can see, the “!” status displays indicate that some operations are still needed before our modules are in a ready state for deployment.
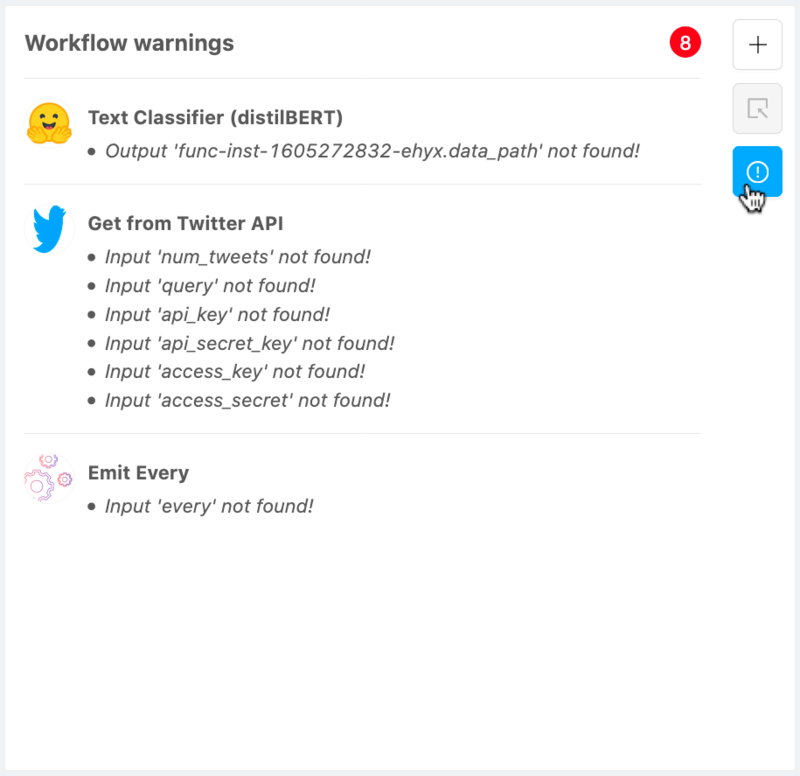
Source “Emit every” module
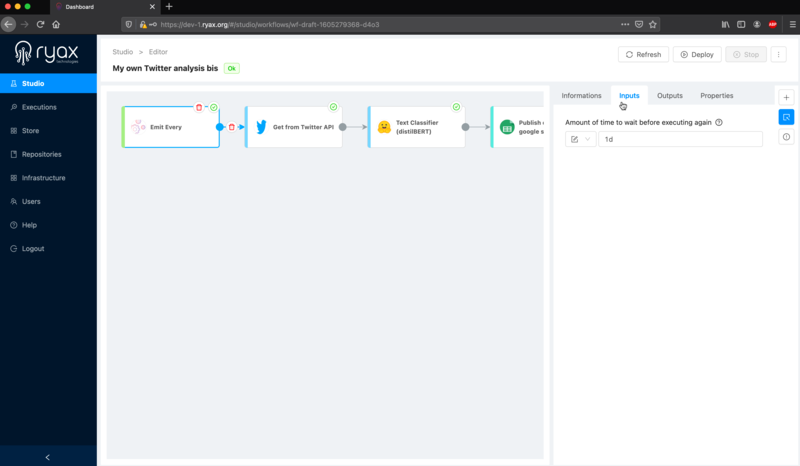
Let’s select the first “Emit every” module in the workflow, the contextual “Module setup” panel will automatically open on the right.
From this configuration panel will be able to quickly setup any module for production. Navigate to the Inputs tab and set it up as follows:
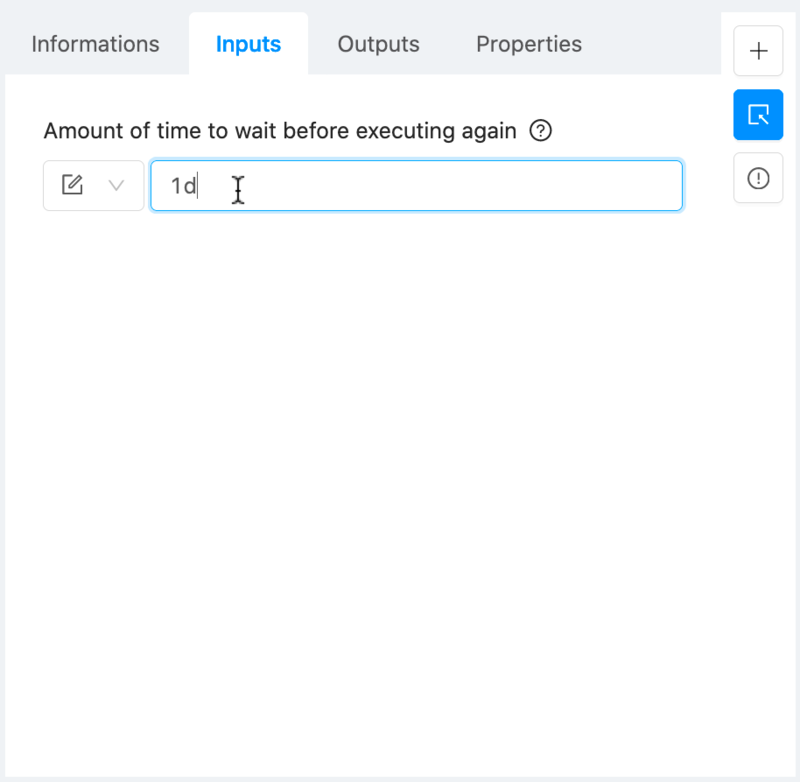
This module is a timely trigger, which means it can generate executions with a fixed frequency. Entering “1d” in the input field implies that our Twitter analysis workflow will be triggered every other day.
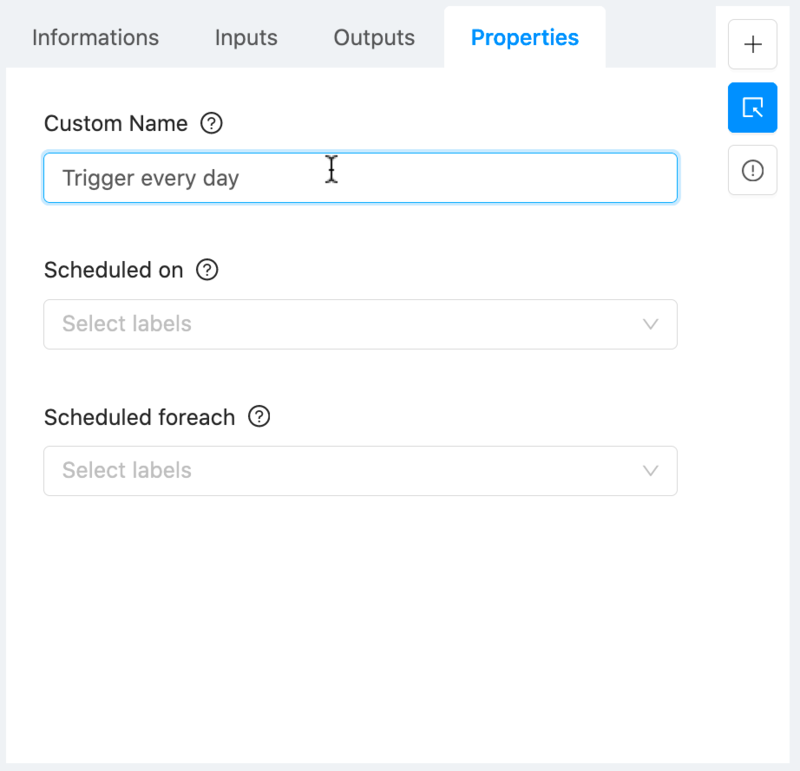
No action is required on the two remaining tabs since they are already set by default. If you want, you can change the “Custom name” of the module from the “Properties” tab for more clarity when displayed in the workflow:

Processor “Get from Twitter” module
Moving on to the next module. As this module handles data retrieval from Twitter’s developer API, we will have to specify a query for the search. No need to provide credentials, on this one we will use our internal credentials hidden away, so you can simply go ahead and try it out.
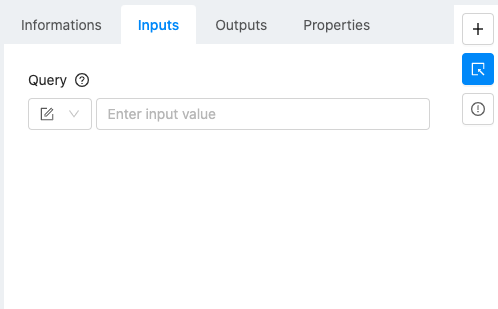
Configuration is simple:
Query: this is a string which we use to search for tweets. If a hashtag, or a hashtag plus some language is desired, just use a # in the query. –> As an example you can use #DataScience
Here is how the module looks after setup:
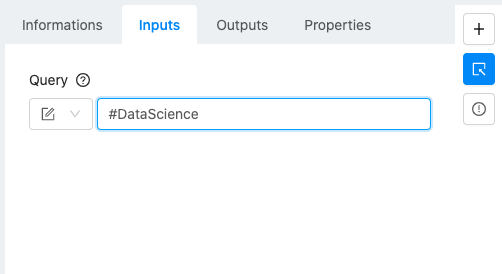
No further configuration is required for this module, and it will display a “green check” status upon completion. When run, the module will fetch 50 tweets searched for according to the input query, and will save those tweets along with some metadata such as timestamps, and usernames, in a tabular fashion in an encoded file. The module returns that file.
Processor “Text classifier” module
This is a typical module that a Data Scientist could have developed. It will take a series of Tweets as an input, and generate a classification as an output. Little configuration is required for this module since it is built to analyze speech and evaluate its overall positiveness/negativeness.
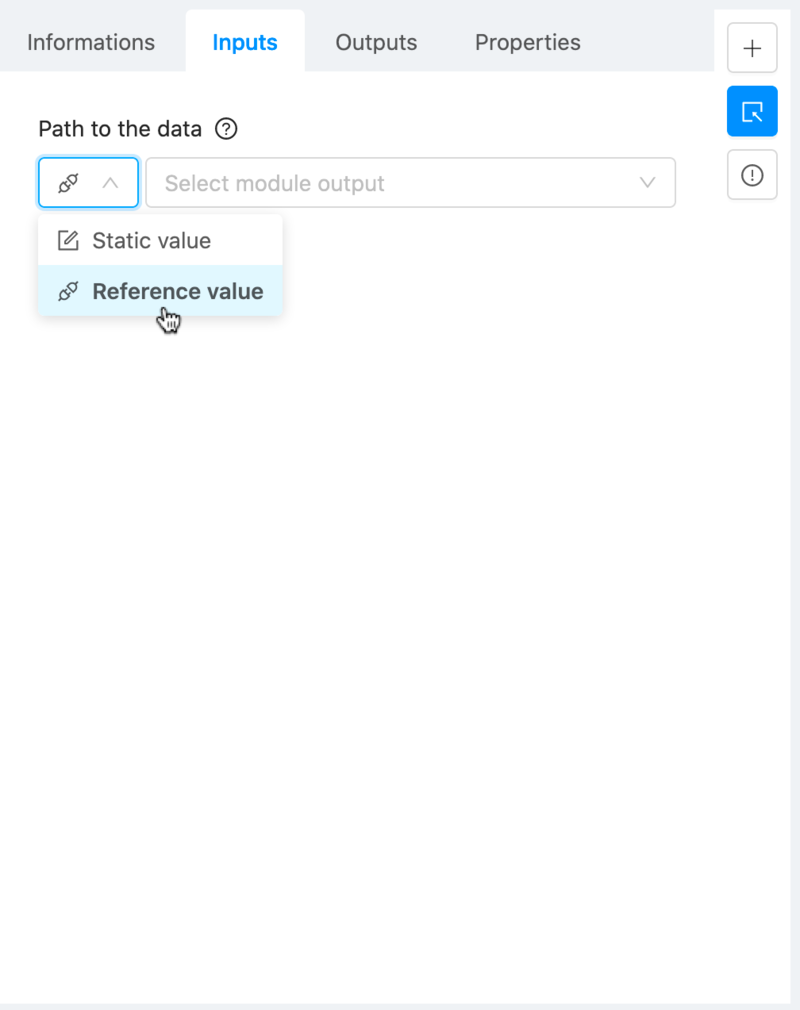
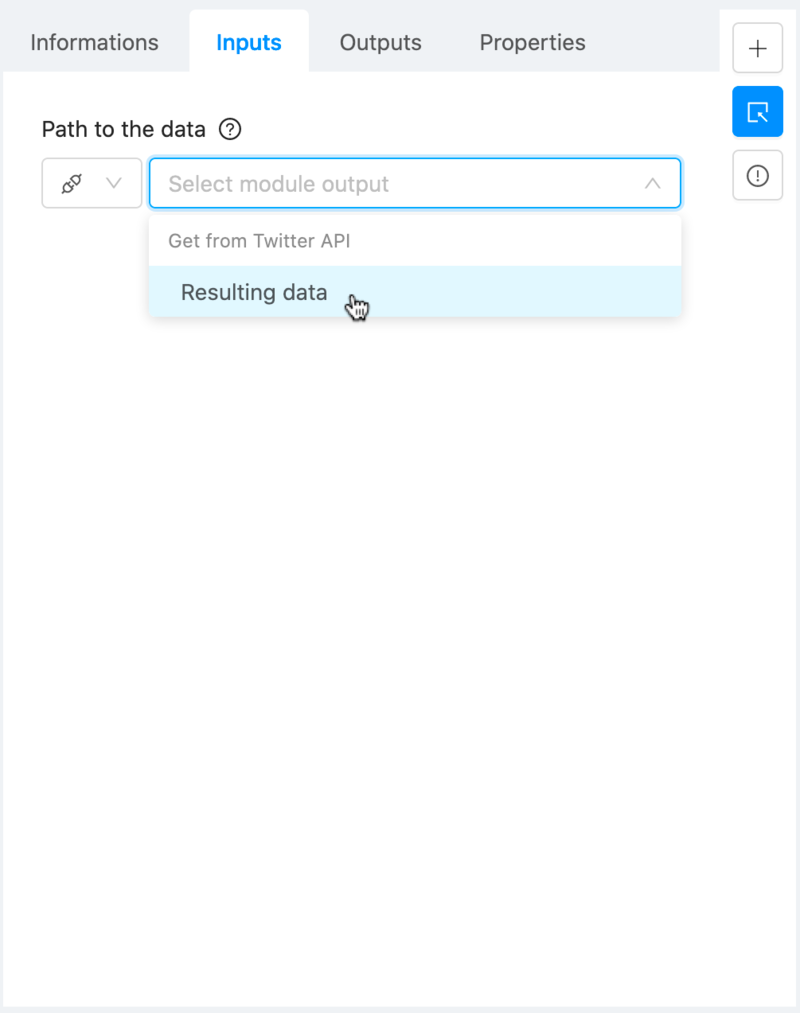
The only thing we’ll have to do is specify its input, which has to be the previous module’s input. To do so in Ryax, navigate to the “Input” tab of the “Module Setup” pane, select the “Reference value” option next to the input field (this will specify that you want to use a reference data stream, already present somewhere within Ryax). Then, you can select the data stream coming from the upstream module, “Resulting data”. This will tell Ryax that you want the current module to ingest the previous module’s data.
More information about this module here.
[Optional] Publisher “Google Sheet” module
This part is optional because it requires more advanced actions to be set up. Using our “Google Sheet” publisher module, you’ll be able to display Tweet classification results directly in a Google Sheet hosted online, instead of getting results from Ryax’s native execution dashboard.

To configure this publisher, you’ll need a Google Sheet API token as described in the Sentiment Analysis on tweets side-tutorial (estimated time: 10 minutes maximum).
There you go! This module has no output and will perform a simple print of the return message from the google API when executed.
Deploying from the studio
As you learned from the previous sections and exercises, within Ryax a workflow has to be in the “deployed” state to run in production. Deployment is the phase where the workflow is built, packaged and loaded by Ryax on production infrastructures.
Before deploying a workflow, we’ll have to make a quick sanity check to ensure it is ready to do so: does it display an “OK” status? If yes, then in most cases this check is all you will need to do, provided that you’ve also had a look at the “Warning” panel in the Editor and took care of fixing all potential warning messages.
Once in the Editor, you can click on the “Warning” panel (on the bar to the right) to open it:
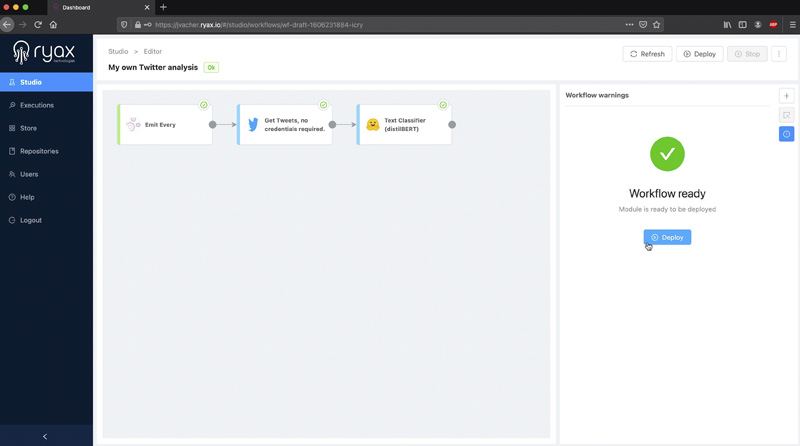
This panel displays any warning or errors Ryax has detected on your workflow. If the “Workflow ready” message displays, in accordance to the “OK” status of the workflow, then we’re ready to proceed with the deployment.
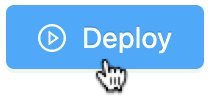
You can now click any “Deploy” button, either from the Workflow list view or from the Studio Editor:
Upon deployment, your workflow will display a succession of statuses: “Creating”, “Deploying”, and finally “Deployed”. It should take a few seconds, if the displayed workflow status does not change, please click the “Refresh” button at the top of the page to actualize.
As a reminder of workflow statuses (covered in the “Ryax tour” sections):
|
OK: workflow is properly assembled and configured, it is ready to be deployed. |
|
Incomplete: workflow is not ready to be deployed (configuration is incomplete, assembly is incorrect, etc). |
|
Creating: workflow deployment is initiated and the workflow is being instantiated in production. |
|
Deploying: workflow is being deployed. |
|
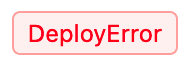
DeployError: workflow could not be deployed. Check module configuration for warnings or errors. |
|
Deployed: workflow is ready to receive inputs and generate executions. |


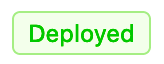
The “Deployed” status ensures that your workflow has been successfully deployed in production: congratulations!
Checking executions
Depending on how your workflow is built, the type of events leading to workflow triggering may differ. In the case of our “Analyze Twitter data” workflow, the triggering event will be a timer, as indicated by the first module (i.e. “source” module) in our workflow:
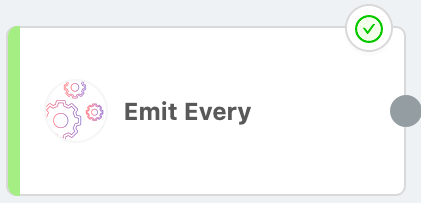
Once we deployed our workflow, this first module has been automatically instantiated and is now running on its own. Since this source module is built to emit events by itself on a regular basis, no further action is required from the user to trigger a workflow execution: meaning that our Twitter analysis will simply run “every X second/minute/hour…”.
To get a reminder as how it was configured, let’s click its module box in the Editor’s canvas and navigate to the “Input” tab:
As indicated in the input box, our workflow will run once a day. If you wish to change this frequency, you can simply undeploy the workflow, modify the input value and deploy the workflow again. This can be done anytime.
Now to executions: when we deployed our workflow the source module triggered its first execution. Let’s click the “View executions” button to check it out:

You’ll be redirected to your workflow’s execution list:
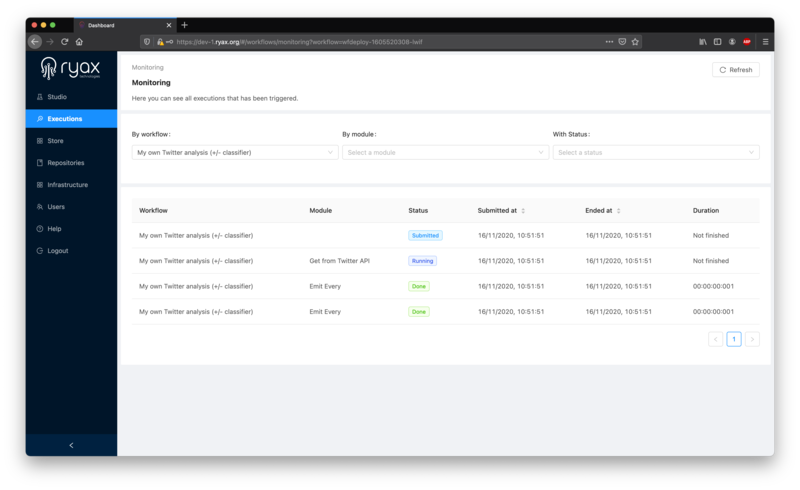
Depending on when you access this screen, there may still be some modules running in the “Submitted” or “Running” stage. This is normal as some steps will take a few minutes to complete: e.g. the Classifier module make take some time to upload and ingest hundreds of Tweets at once.
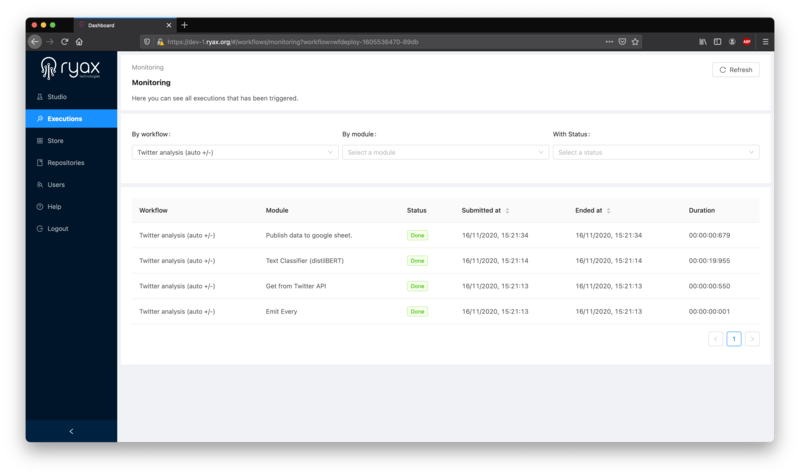
You can refresh the list to watch the execution propagate, after a few minutes all modules should have executed successfully (“Done” status), as the workflow ran from end to end:
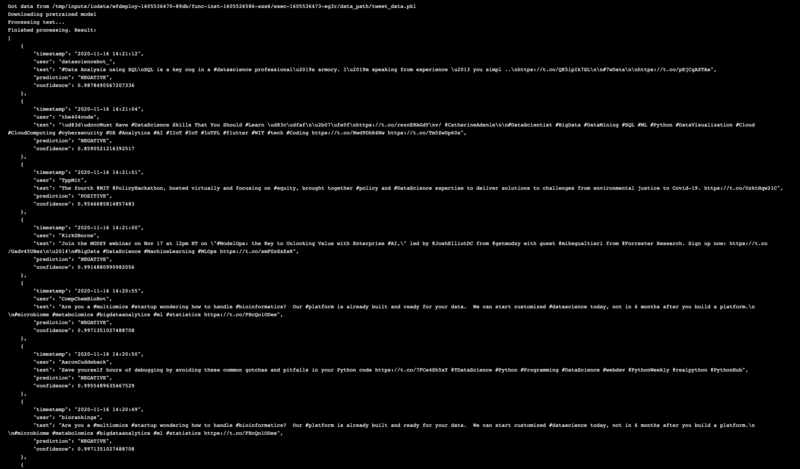
To access the final results of your workflow, click on any “Text classifier” execution. You’ll view the classification results in the log window of the execution dashboard:
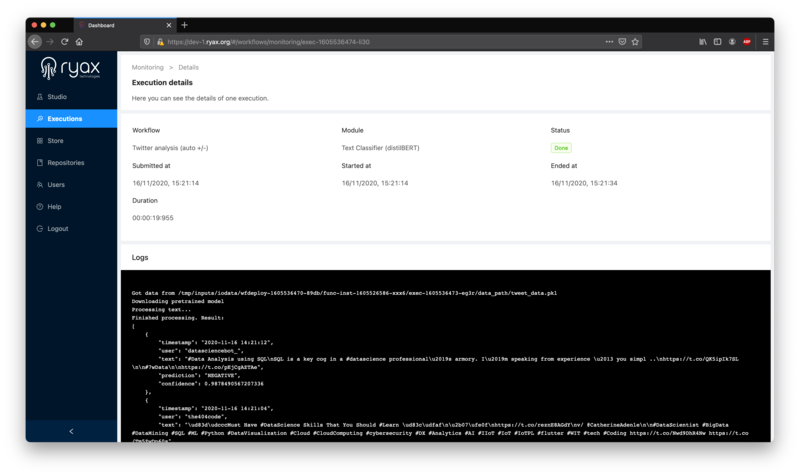
As you can see in this example (which will very probably be different from yours, since the workflow pulls actual Twitter data), the first Tweet was deemed as negative with a 98.78% confidence score, the third Tweet is judged rather positive with a 95.47% confidence index, etc:
[Optional] Check executions in the Google Sheet
If you’ve set up the optional Google Sheet API publisher module, then you’ll be able to access a more advanced result visualization of your workflow. Simply type the Google Sheet’s URL you’ve created in your browser to watch the output data:
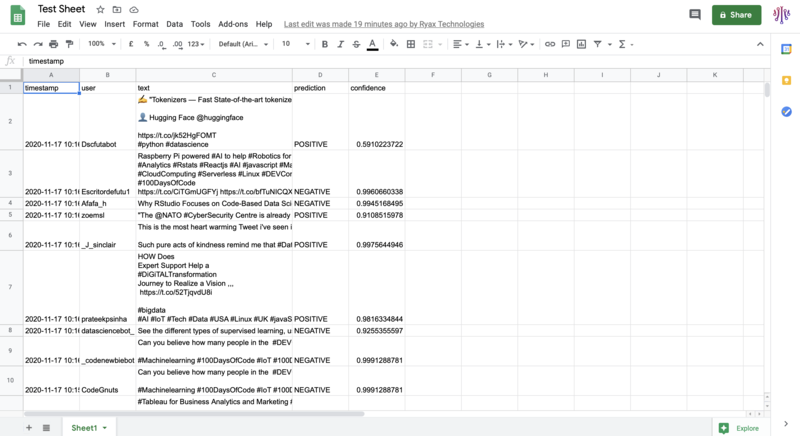
The sheet displays the Tweets’ timestamp, author, content and the executed workflow results: algorithm interpretation (positive or negative), and confidence index (between 0 and 1).
Please note that any additional execution of the workflow will append its results below existing rows.